Start-to-Finish: Color Photo
The Goal
Here's a demonstration of converting a photo to a stitch pattern, integrating the stitch pattern with an Original Pattern Drafting piece and using the design in Interactive Knitting.
Section 1 is a start-to-finish demonstration with no interruptions about options or explanation of "why".
In the next sections, we'll go back step-by-step to help you not only understand the choices made, but to help you adapt the steps to your project.
Section 1 is a start-to-finish demonstration with no interruptions about options or explanation of "why".
In the next sections, we'll go back step-by-step to help you not only understand the choices made, but to help you adapt the steps to your project.
- Watch as we convert our photo
- Follow the step-by-step videos
- Then work through the Walk Through exercise of the same steps
- Take the challenge with sample images
- Convert a photo of your own
Start-to-Finish
Use the Wizard
The Graphic
Plan The Knitting
Grid Essentials
Working with Colors
Save Settings
Stitch Designer
Use the Wizard
The Graphic
Plan The Knitting
Grid Essentials
Working with Colors
Save Settings
Stitch Designer
Start-to-Finish: Color Photo
Start-to-finish: Color Photo
Start-to-Finish: Color Photo
Use the Wizard
Start-to-Finish: Color Photo
The Graphic
- Open a graphic image of the recommended format

- Use >File >Thumbnails to make it easier to locate
- The file should be large enough and clear enough for DAK to have data to work with.
A tiny, fuzzy image won't give the best results.
- Consider editing the image with image editing software before importing it into Graphic Studio

Start-to-Finish: Color Photo
Plan the Knitting
Start-to-Finish: Color Photo
Grid Essentials
The Grid settings are essential for giving DesignaKnit the information it needs to perform the conversion.
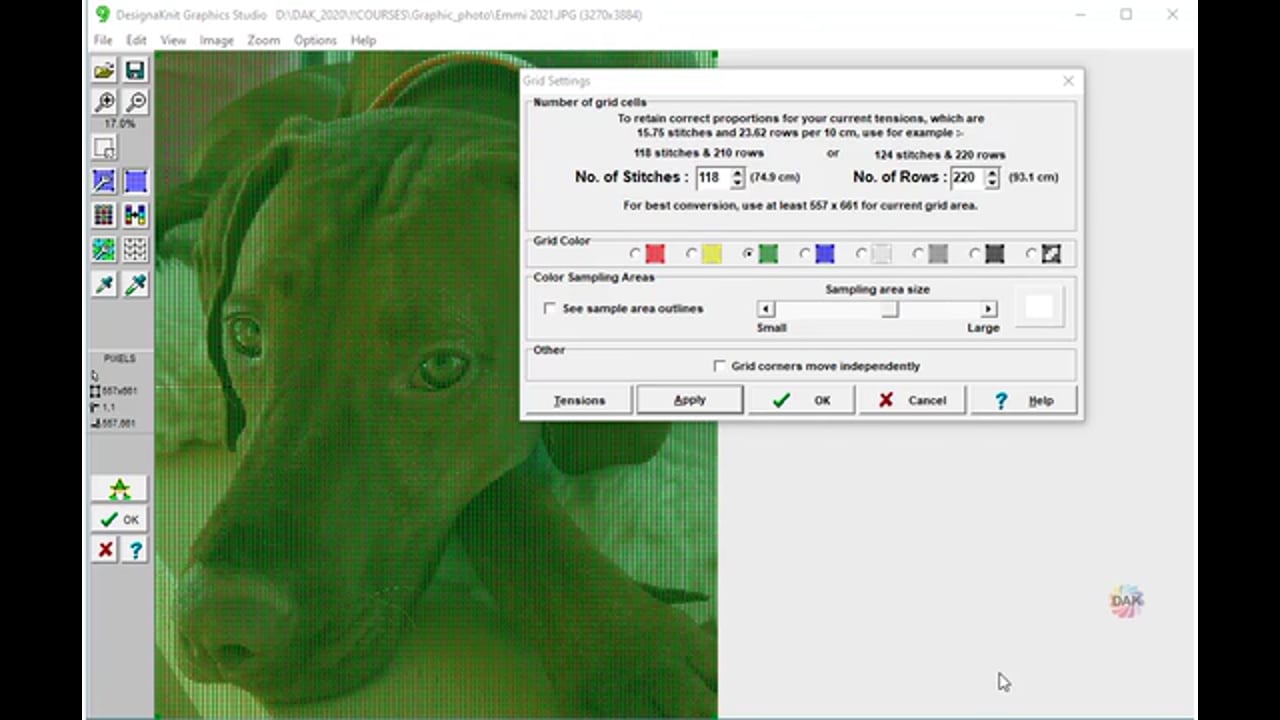
Grid Setup
Color Sampling
If your image is not "clean" or if Graphics Studio is having trouble identifying colors, try using the Color Sampling Feature. Adjusting the color sample outlines will help DAK focus in on fewer pixels and make the conversion more accurate. This may be a matter of trial-and-error with some images


Start-to-Finish: Color Photo
Working with Colors (Tidy Image)
Start-to-Finish: Color Photo
Save Settings
As you are working and when you are ready to process the conversion, Graphic Studio will prompt you to save the settings.
This prompt is for the CONVERSION SETTINGS, not the image itself.
If you've cropped the image, for example, use >File >Save Graphic as
 to save the edited IMAGE.
By saving the CONVERSION SETTINGS Menu >File >Save Settings

, you can re-use them.
This prompt is for the CONVERSION SETTINGS, not the image itself.
If you've cropped the image, for example, use >File >Save Graphic as
By saving the CONVERSION SETTINGS Menu >File >Save Settings

For example, we've set up all of the different settings to convert this rose.jpg file for a blanket. I want to make another blanket with a similar image.
To use previous conversion settings:
- Open the original rose blanket graphic WITH THE SAVED CONVERSION SETTINGS
- Open the NEW graphic to prepare it for conversion
- The previously saved conversion settings will be in place for you to use with the new graphic. (Saves time if you use the same settings often)
If you use the same settings often, you can save time by opening the previous image, then start working with the new image and the saved settings will be available for the new image conversion.
Save the Graphic Image file

Save the Conversion Settings

Settings that are saved:
- Image type
- Zoom level
- Selection Box
- Grid Settings
- Conversion settings for "picture"
- Conversion settings for "diagram"
- Yarn Colors
Start-to-Finish: Color Photo
Stitch Designer
Start-to-Finish: Color Photo
Select a lesson from the menu to get started.